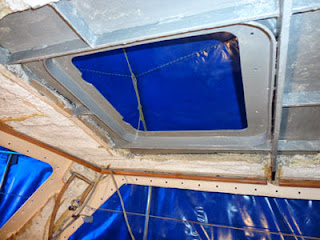
Monday
morning 8am, we’ve got a message on the voicemail, saying the sandblast truck
will be at the yard at 11. 3 hours! Urgent call to Grandpa Germain, who thought
he was going kite surfing. JF jumps in
the car and drives over to the boat to assemble the tent that will protect the
boat, or more precisely all the neighboring boats. We had planned for 24 hours of notice; we’ll
have to do with 3. The tarp is mounted
on the structure licked-split, stapled in place and weighted down with all the
wood blocks of the neighborhood. 9h45,
the ttrucks shows up. Of course, the
previous client was a no-show! The tent
is up but the boat is not well prepared, we’ll have to vacuum after. The guy gets to work… wow, it’s loud. The yard owner shows up; “Is it going to be
done soon?”. I hope so, it’s quite
stressful.
Eventually
it is and we go peek inside. Under the
boat, it looks like “The day after”, there’s a fine layer of white dust
everywhere. Climbing up in the boat, it’s
worse: There’s probably no sand left in
the Bahamas, it’s all in our boat.
On
the good side, the centerboard looks great, albeit full of holes, and the well
looks much better than I expected, without any perforation. The other great news is that it’s over! No
more sandblast! What a messy job…
Robert, the sandblaster (…), deserves every penny he earns: He just spent 2 hours in this crazy
sandstorm, more than half of which he spent on his back under 42000lbs of steel,
shooting sand straight up in a hole right above his head. Errr!
When all is said and done, Jean-François and Germain spend the rest of
the day epoxy-sealing the bare metal as well as cleaning the boat, carrying more
than 4 shop-vac loads full of sand to the dumpster.
Jean-Pierre
was available un Tuesday night to do some touchups and a few welds, we spent
the whole day preparing for the job, grinding and cleaning the trouble spots as
well as setting up yet another temporary shelter, because it’s raining again.

Speaking of temporary shelters, we discovered
a trick worth sharing (perhaps it’s common knowledge already…). On a light wood structure, unroll a light
paint tarp. Up to this part, nothing
new. The problem is though, thin plastic
tarps are cheap to buy but hard to keep in place with wood staples. It is common to use cardboard with the
staples but the process is slow. In the
hurry on Monday morning, we used duct-tape.
Goes like this: When the tarp is ready for stapling, run a length of
tape on it, right over the wood beam, then staple right through. The tape is much more tear resistant than the
plastic and spreads the load evenly to it.
On high strain areas you can run 3 layers of tape one over the other
before stapling. It’s quick and very
solid. With an honest wind blowing and
the storm of the sandblast compressor, nothing gave during the whole job.
Anyway,
back to the story: Jean-Pierre showed up
at 6 and we worked merrily, even tacking the arch in place. What a joy to see the boat take shape
again.
And
it is also the first evening we spend aboard, shooting the breeze in the cockpit
until 10 or so. But JP has limited availability in the next few weeks, which means the cutting files and by
extension the design of the cockpit pigeonholes have to be sent out to him Wednesday
night.
That
gives Germain a chance to go back home and JF, Shannan and the boys a chance to
go see Grandma Céline, do the laundry and fill up on drinking water (the cabin
water has got iron in it: harmless but awful tasting). During our absence, a big storm blows over,
high winds and hail. A neighboring boat
in the yard, fresh out of the water that same day is blow over on its
side. Wow, too bad for him and a bit
relieved that it’s not us…
Yesterday,
Germain and JF run insulation tests. It
is common to use panels to replace insulation with cans of sprayed foam in the
gaps. We’re wondering if we can use only
the cans if we control the thickness with a wax paper covered piece of wood under it.
It
would make a very clean install, close to the original with the added advantage
that we could insert the wood pieces onto which the overhead is screwed directly in place without glue.
The result is interesting.
Advices on the can: 1) The foam
will dry in 6-12 hours. FALSE: The next morning, the center is still sticky.
2) Fill the space with 50% foam, leaving
room for expansion. TRUE: The wood plank arched badly under the
pressure of the expanding foam. We’ll
put much less on the second try…
In conclusion, we weathered a cape this week. All the new stainless steel hatch boxes are
in and scealed with epoxy primer.
Welding is almost dome for the season, which will mean the boat will be
once more watertight and the cockpit presentable, with only the swim platform
to do next year. On that subject,
Jean-Pierre had a good idea: Why not open the back of the cockpit, like on most
modern boats? There would be more room
for the helmsman, no fence to climb down to the swim platform, we could get rid
of the 2 big cockpit drains, now redundant…mmm, interesting.
Another front on which we made serious progress: The wood
frames. The latter are all reassembled and
mostly sanded. They’ll be ready for
varnishing in a week or two, depending if we receive the wood for patches fast
enough.
That boat will not rot in a yard! We’ll go sailing soon…


