Sunday, November 10, 2013

Conclusion of 2013 work season

It is with an improbable string of warm sunny days that we conclude work on OneLove.  All that is left is to finish up paint and 
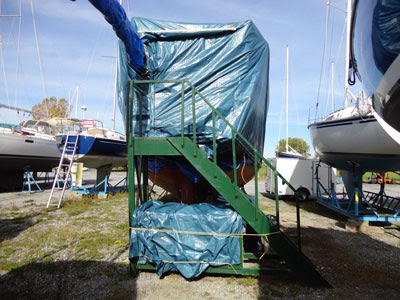
insulation as well as protect the boat for the 20 months it will spend without us.  We are leaving for Florida on the 16th of October; With 6 days to close up the cabin, the boat and to generally prepare our departure, work on the boat has to be completed by the 8th.  Intense days ahead…

Once the frames are varnished and ready to install, we move on to the insulation in the salon.  The problem is to properly fasten the frames in place, without them being mechanically joined to the windows or the steel structure of the boat, as well as to be readily removable for inspection or repair.  In the salon, unlike on the overhead,  the insulation has to follow precisely the contour of the frames.  After much pondering, the best idea seems to be to anchor the frames to small cedar blocks all around their perimeter, using screws inserted at 45°.  This way the frames can be removed and reinserted at will, just by taking out the screws.  Part of the challenge is to make a system that is solid enough to withstand the weight of the frames, some of which are in excess of 40lbs.  
We try one and the result is conclusive:  We first cover the frame with wax paper, then screw the cedar blocks around it.  We clamp the frame in place and proceed with insulating using the same technique of sheets and can, making sure we fill any void around the block, especially in the back, between them and the steel.  When everything is dry and cured, we unscrew and remove the frame, to get rid of the wax paper, clean up and even-out the insulation as well as to slap a coat of latex paint on it, to act as fire retardant and to prevent it from retaining odors,  one of the known vices of sprayed insulation.  
In order to do all this, we need to cover the whole salon in plastic tarp, the canned foam is messy and the whole shebang creates an ungodly mess, especially when removing the excess insulation with a knife.
The process takes more than 3 days but what a pleasure to see the nice varnished frames back in place in their insulation beds.  And what a contrast with the cold shower that befell us last year when we had to tear it all apart.  It is one big step completed: we’re almost back at the starting point, aesthetically


The overhead frames present the same dilemma: They need to stay in place, be removable and free of mechanical lien to the hatches or the steel structure.  The nice local hardware store owner suggests using silicone sealant.  It is not technically glue but used proficiently, it will hold the frame in place.  Should we need to remove it, pulling gently should result in the silicone giving, not the varnish or worse, the frame itself:  It proves successful.  With the job completed, we will be able to reinstall the overhead before we leave.  That’s great news, like a little Redbull for the soul!


Amongst these jobs we also have to conclude the paint folder.  3 gallons of epoxy primer and 15 coats in the centerboard trunk later, we apply a coat of two-part polyurethane on all exterior painted surfaces, to protect them from the UVs.  
 Then we can reassemble the trunk lid, the interior joinery and the nav station instrument panel.  That completes the projects for this season; All that is left is to prepare the boat for the harsh winter to come.
Quicker said than done:  it takes more than 8 hours of vacuuming to thoroughly clean up the interior and deck, there is leftover sanding dust everywhere.  Temporary reinstall of the acrylic salon windows, sealed with gaffer tape.  The assembly of a semi-rigid roof system over the cockpit is next; we took the decision to forego shrink-wrap this time around.  First, the boat doesn’t need it, being now almost watertight, second because it is much cheaper to put layup good quality tarps over the boat than to shrink-wrap it.  

Leaving last year’s wrap over the cabin and foredeck, there will be 4 layers there and 3 over the cockpit.  Complete with a smaller tarp directly over the cabin and the old plexi …there will be no water in this boat. 
2 days later, check.


Then we decide to leave the cushions in the boat as opposed to the trailer; they’ll have better aeration.  

We pile them up in the salon, leaving a gap all around for air flow and a sheet over them for dust and mildew.  Then we put away the tools and protect the exterior stairs and workbench. 
D-O-N-E
What a piece of work.


Then we pull the trailer to Grandpa’s house.  The spot where it will be stored is prepared, concrete blocks laid down, the trailer is emptied to be rolled back there empty, filled up again, the wheels removed to protect the tires from the sun, everything greasable greased and a tar slung over it.  
In the foreground in the picture, you can see Grandpa’s Nacra F18II.  The apple didn’t fall far from the tree…


It is from a hotel room in Taiwan that we write this last post for 2013.  Work is all one and OneLove is ready for all that a Canadian winter can throw at it.  While we are abroad for work until June 2015, we’ll finish filling up the cruising kitty, all the while taking the time to find her a new name and color. Then one more summer of work and we’ll splash her.  After that, the sky’s the limit…
Thanks for following us this summer.  We wish you fair winds, perseverance and success in your endeavors and mostly your dreams and we invite you back around the summer of 2015.
JF, Shannan, Joshua and Benjamin.


Friday, October 4, 2013

D-4

Grandpa just left; we worked real hard these last three days.  Last coat of varnish on the wood frames;  quite pleasing.  
Then we moved on to the hatch installation job.  JF had underestimated the time needed to clean them prior to installation, and that’s an important step:  The best sealer will only bond as good as the surface beneath it.  So after a full day of cleaning (thanks Germain!) they came right back to almost-new .  
  Then it’s the install per se.  In the case of hatchs, metal to metal and screwed in place, the strength and elasticity of Dow 795 and Sika 295 are overkill, we opt for Sika 291.  Still not resitant to UV but it doesn’t matter, the joints will be painted with the deck. 
 
The two smallest hatchs have a flange that penetrate the deck, on top of being all the way aft on the cabin top and protected behind the dodger:  They’ll go in without mechanical fasteners, with the leftover tube of Dow 795 from this summer;  No screws, no rust.


Then, insulation:  The tests we had run with can sprayed insulation were conclusive:  Too long, too complicated, too expensive, to hard to get a consistant result.  We opted for plan B instead, which proved excellent:  A sheet of insulation is cut to fit all the holes, very tight and hard to get.  Then you remove them and shoot can sprayed foam behind and close back up.  Fill in the cracks with the leftover.  
The next day you clean up with a knife and do a second application of foam if needed.


Wednesday, October 2, 2013

D-Day minus 7

Only 7 more days of work before we start the cleanup-closedown-protect operation on the boat.  It’s been sunny and warm all week without a drop of rain forecasted till Sunday.  It is a rare chance not to be missed in Quebec in September/October.  We finalized the wood frames, lots of sanding, wood-filling, resanding, taping but finally it is done:  2 coats of epoxy sealer on the back, 2 coats (out of 3) of varnish on the front.  It is incredible to think we were going to throw all that rotting pile of wood to the garbage and start anew!  Properly revarnished old wood is so rich.  You can see the age of the boat, the old darkened wood, the blackened wood, some new light colored wood that replaced old one, too rotten to keep.  We can see the patches, here because there used to be a windshield wiper, there because JF had to chisel it out last year.  Once well sanded and varnished, it says “boat that’s well loved” and it’s cheaper and faster than new frames!

On the program tomorrow: Last coat of varnish on the frames, finish up insulation around the hatch boxes, clean-up and installation of the hatches proper.  Busy day ahead of us.


Friday, September 27, 2013

Moving forward

We are in the last straight: Lots of work and little time left, including writing… We’ll keep the text short and put a lot of pictures.
After the sand blasting and welding of the hatch boxes, we start painting inside and out.


One coat of sealer and 3 coats of epoxy barrier coat on stainless steel and six coats on regular steel.  How to keep count? 
Little list taped on the galley counter. 


The centerboard trunk will get one coat a day until we leave; we don’t want to do this again anytime soon!  JF found a way to get it done efficiently, if not comfortably or safely (claustrophobia anyone?):  Half from under, sitting in the trunk (8” wide, can’t turn the head; And the mask doesn’t fit), the other half from the top.


Jean-Pierre came back for the last welding day of the season.  We fix the cockpit, install the new stainless steel pigeonholes (doors not on the picture) and weld in plates in place of old holes.  

With a coat of paint it’s starting to look like something.


After the coat of paint that occupies most of the mornings lately, we keep moving forward with the wood frames.  We found blond Oak and had it planed down to the right thickness to replace the rotten parts; Grandpa Germain attacks the sanding.  

Even the frame that had to be chiseled out (there was a foot of it missing) is rebuilt (screwed into its old window for template).  

The result is excellent; especially if you consider that we did all of that outside on a makeshift workbench with only a router and a belt sander.  This afternoon we took a picture of all the frames, glued, patched and sanded down to 220, almost ready for varnishing.


This week, last phase of the frames, interior insulation and deck hatches installation, after the mandatory 15 days wait period for the paint to harden.

Friday, September 13, 2013

Big week

Monday morning 8am, we’ve got a message on the voicemail, saying the sandblast truck will be at the yard at 11.  3 hours!  Urgent call to Grandpa Germain, who thought he was going kite surfing.  JF jumps in the car and drives over to the boat to assemble the tent that will protect the boat, or more precisely all the neighboring boats.  We had planned for 24 hours of notice; we’ll have to do with 3.  The tarp is mounted on the structure licked-split, stapled in place and weighted down with all the wood blocks of the neighborhood.  9h45, the ttrucks shows up.  Of course, the previous client was a no-show!  The tent is up but the boat is not well prepared, we’ll have to vacuum after.  The guy gets to work… wow, it’s loud.  The yard owner shows up; “Is it going to be done soon?”.  I hope so, it’s quite stressful.  

 Eventually it is and we go peek inside.  Under the boat, it looks like “The day after”, there’s a fine layer of white dust everywhere.  Climbing up in the boat, it’s worse:  There’s probably no sand left in the Bahamas, it’s all in our boat. 
 

On the good side, the centerboard looks great, albeit full of holes, and the well looks much better than I expected, without any perforation.  The other great news is that it’s over! No more sandblast!  What a messy job… Robert, the sandblaster (…), deserves every penny he earns:  He just spent 2 hours in this crazy sandstorm, more than half of which he spent on his back under 42000lbs of steel, shooting sand straight up in a hole right above his head.  Errr!  When all is said and done, Jean-François and Germain spend the rest of the day epoxy-sealing the bare metal as well as cleaning the boat, carrying more than 4 shop-vac loads full of sand to the dumpster.


Jean-Pierre was available un Tuesday night to do some touchups and a few welds, we spent the whole day preparing for the job, grinding and cleaning the trouble spots as well as setting up yet another temporary shelter, because it’s raining again.  
Speaking of temporary shelters, we discovered a trick worth sharing (perhaps it’s common knowledge already…).  On a light wood structure, unroll a light paint tarp.  Up to this part, nothing new.  The problem is though, thin plastic tarps are cheap to buy but hard to keep in place with wood staples.  It is common to use cardboard with the staples but the process is slow.  In the hurry on Monday morning, we used duct-tape.  Goes like this: When the tarp is ready for stapling, run a length of tape on it, right over the wood beam, then staple right through.  The tape is much more tear resistant than the plastic and spreads the load evenly to it.  On high strain areas you can run 3 layers of tape one over the other before stapling.  It’s quick and very solid.  With an honest wind blowing and the storm of the sandblast compressor, nothing gave during the whole job.  
Anyway, back to the story:  Jean-Pierre showed up at 6 and we worked merrily, even tacking the arch in place.  What a joy to see the boat take shape again.  
And it is also the first evening we spend aboard, shooting the breeze in the cockpit until 10 or so.  But JP has limited availability in the next few weeks, which means the cutting files and by extension the design of the cockpit pigeonholes have to be sent out to him Wednesday night.
  That gives Germain a chance to go back home and JF, Shannan and the boys a chance to go see Grandma Céline, do the laundry and fill up on drinking water (the cabin water has got iron in it: harmless but awful tasting).  During our absence, a big storm blows over, high winds and hail.  A neighboring boat in the yard, fresh out of the water that same day is blow over on its side.  Wow, too bad for him and a bit relieved that it’s not us…

Yesterday, Germain and JF run insulation tests.  It is common to use panels to replace insulation with cans of sprayed foam in the gaps.  We’re wondering if we can use only the cans if we control the thickness with a wax paper covered  piece of wood under it.  
It would make a very clean install, close to the original with the added advantage that we could insert the wood pieces onto which the overhead is screwed  directly in place without glue.  
The result is interesting.  Advices on the can:  1) The foam will dry in 6-12 hours.  FALSE:  The next morning, the center is still sticky. 2)  Fill the space with 50% foam, leaving room for expansion.  TRUE:  The wood plank arched badly under the pressure of the expanding foam.  We’ll put much less on the second try…
In conclusion, we weathered a cape this week.  All the new stainless steel hatch boxes are in and scealed with epoxy primer.  Welding is almost dome for the season, which will mean the boat will be once more watertight and the cockpit presentable, with only the swim platform to do next year.  On that subject, Jean-Pierre had a good idea: Why not open the back of the cockpit, like on most modern boats?  There would be more room for the helmsman, no fence to climb down to the swim platform, we could get rid of the 2 big cockpit drains, now redundant…mmm, interesting.
Another front on which we made serious progress: The wood frames.  The latter are all reassembled and mostly sanded.  They’ll be ready for varnishing in a week or two, depending if we receive the wood for patches fast enough.

That boat will not rot in a yard!  We’ll go sailing soon…